BlueGranite helps organizations discover opportunities to evolve through technology and realize their full potential. Subscribe to our blog to gain insights into the latest tools for data management, the modern data platform, business intelligence, and AI.
Azure Data Factory (ADF) V2 is a powerful data movement service ready to tackle nearly any challenge. A common task includes movement of data based upon some characteristic of the data file. Maybe our CSV files need to be placed in a separate folder, we only want to move files starting with the prefix “prod”, or we want to append text to a filename. By combining Azure Data Factory V2 Dynamic Content and Activities, we can build in our own logical data movement solutions. Follow our walkthrough below to discover how.
Dynamic Content: What, Why, Where and How to Use
What: Dynamic Content is an expression language that uses built-in functions to alter the behavior of activities in your pipeline. Many of the functions, like IF() and CONCAT(), are familiar to many users of Excel or SQL.
Why: Dynamic Content decreases the need for hard-coded solutions and makes ADF V2 Pipelines flexible and reusable.
Where: To access Dynamic Content, place your cursor into the file path or file name areas of Datasets.
How to use: Combine expressions to easily create endless dynamic pathing options. From updating filenames using CONCAT() to complicated directory structures and file pathing based upon pipeline and file names, pipeline execution time, and more.
Tutorial Requirements
We’ll use three additional Azure Data Factory V2 tools for our use case:
- To copy our data from one location to another we will use the Copy Activity
- For file or directory information (like the contents of a directory), we need the Get Metadata Activity
- To iterate through a list of files contained within a directory, we have the ForEach Activity
Tackle Complex Data Movement with Ease
Now that we have some background, let’s get to our use case. The Census Bureau releases new American Community Survey data annually, which contains U.S. household education, housing, and demographic information. We’re going to split the individual files out by multiple criteria. Estimate files and margin files each need to be grouped together and segmented by sequence, plus some files need to be handled based upon their file extension.
To get our data, we used the HTTP connection with the ZipDeflate option to download Alabama_All_Geographies_Not_Tracts_Block_Groups.zip, a file containing census data for the state of Alabama, to our Azure Blob Storage account. Alabama_All_Geographies_Not_Tracts_Block_Groups.zip has over 200 files that contain city and county level information along with corresponding statistics.

We want to segment the files to make it possible for another application to efficiently process entire folders of files that share the same schema. The rules for segmentation are below:
- If file starts with ‘e’ for estimate, place in a folder like ‘seq//e/’.
- If file starts with ‘m’ for margin of error, place in a folder like ‘seq//m/’.
- If file starts with ‘g’ for geo, place in a folder like ‘geo/csv’ or ‘geo/txt’ based upon the file extension.
For example, e20165fl0001000.txt starts with ‘e’ indicating it is an estimate file (e20165fl0001000.txt). The sequence number for the file is 001 (e20165fl0001000.txt). The final location for the file should then be ‘seq/001/e/e20165fl0001000.txt’.
We handle the margin file, m20165fl0001000.txt, in a similar way. The final location should be ‘seq/001/m/m20165fl0001000.txt’
The census bureau also has geo files like g20165fl.csv and g20165fl.txt, which are not specific to a particular sequence, so we will handle them differently.
The final location for g20165fl.csv will be ‘geo/csv/g20165fl.csv’. For g20165fl.txt, the location we want is geo/txt/g20165fl.txt
To complete our goal, we will need to use Get Metadata, ForEach, and Copy activities in combination with the Dynamic Content functionality provided in ADF V2.
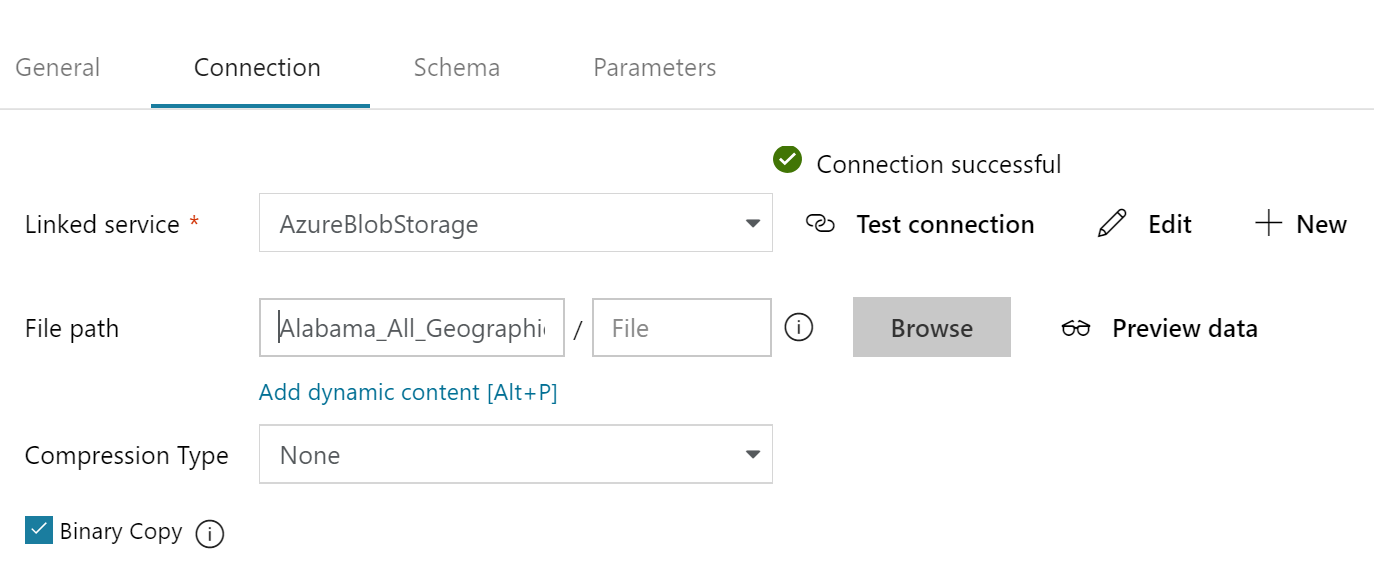
We start by creating a dataset referencing our Alabama census zip file. We can put in any name we would like to use (I named mine AlabamaCensusZip) and then point to the blob storage location where we have saved our zip file. Note that when we point to the zip, it displays in the Directory portion of the file path.
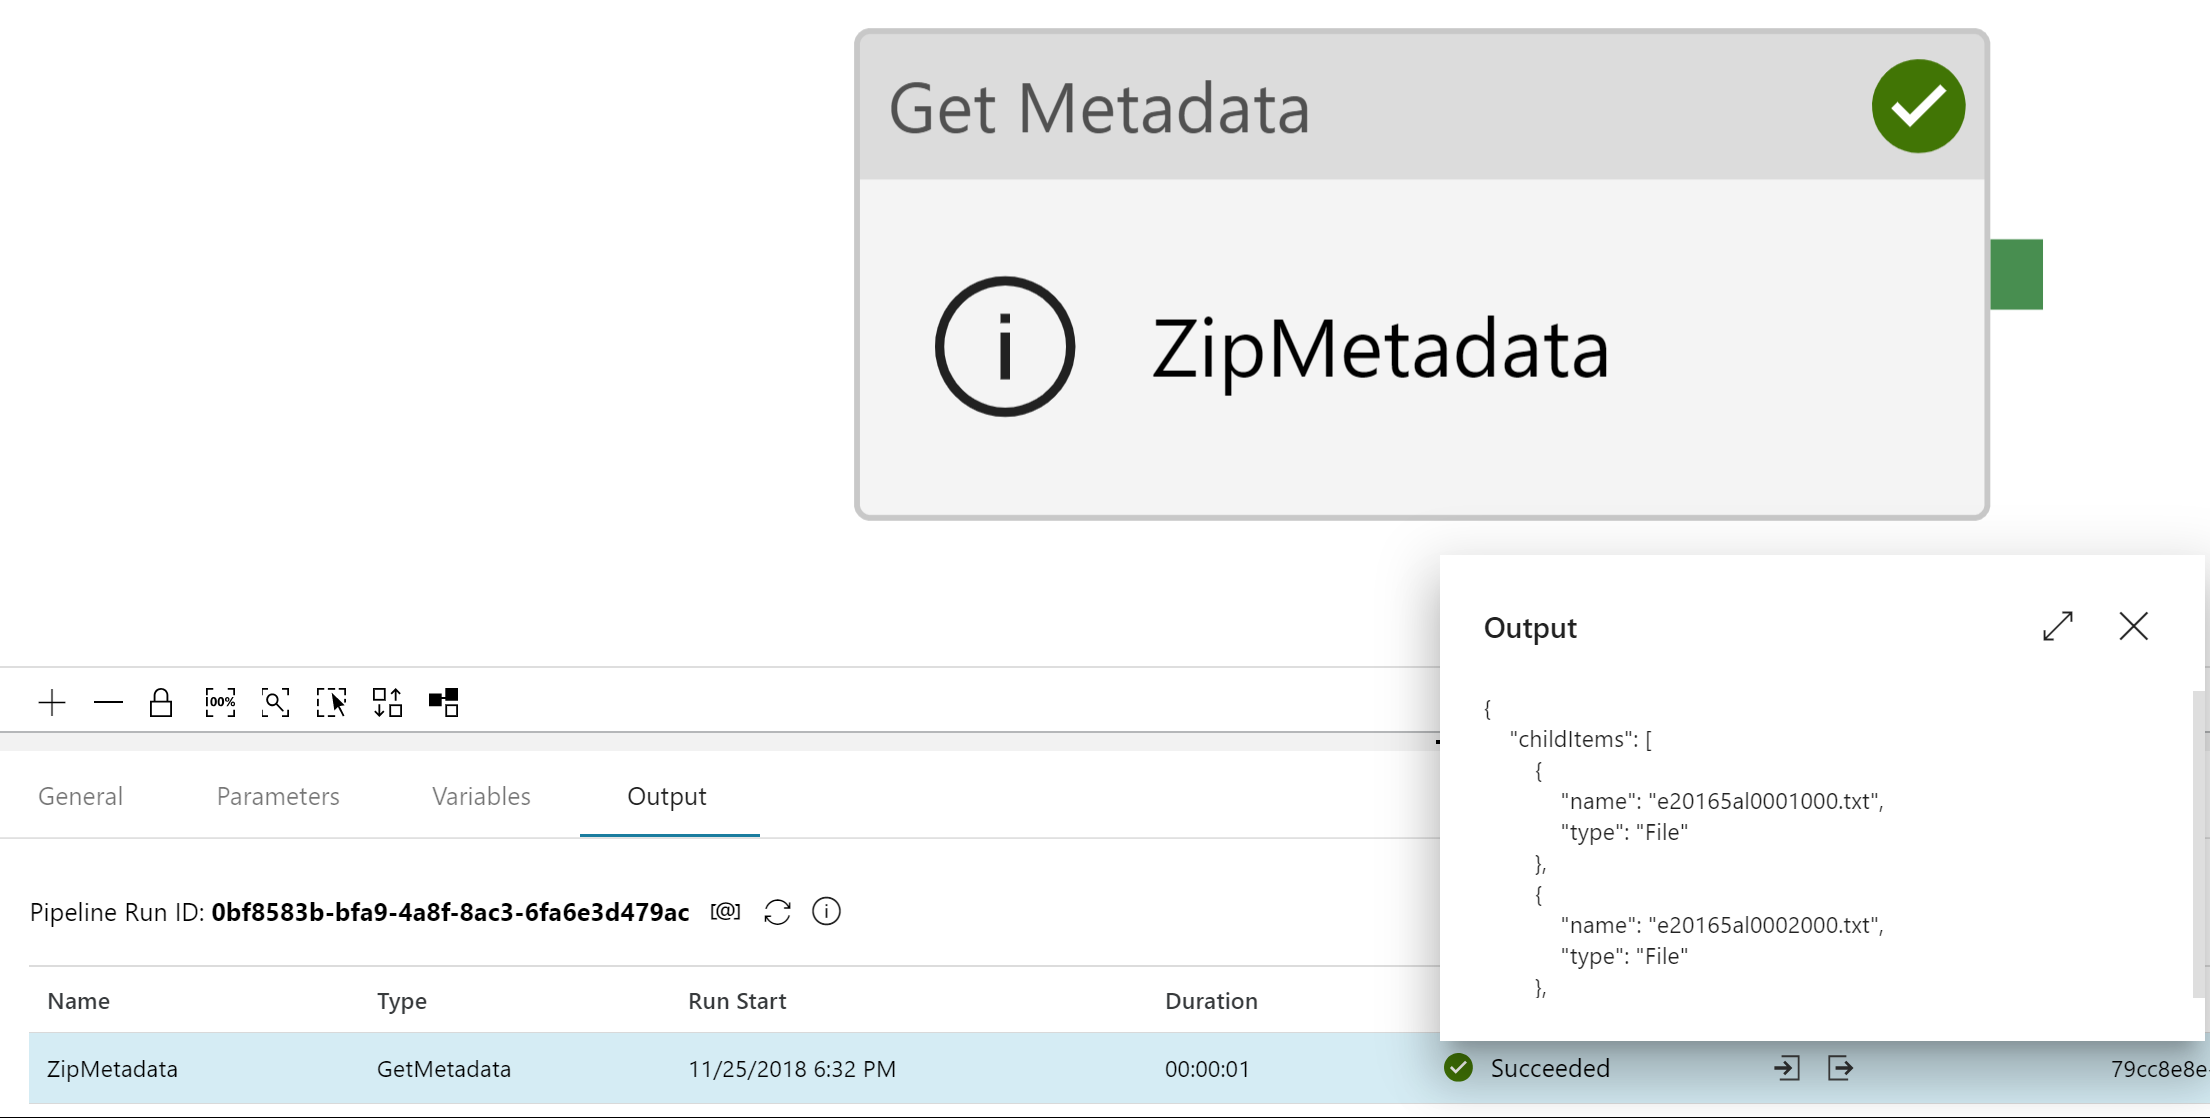
Once we have the dataset created, we can start moving the activities into our pipeline. First is the Get Metadata activity. We point the Get Metadata activity at our newly created dataset and then add an Argument and choose the “Child Items” option. The Child Items option reads in the file names contained within the .zip and loads the names into an array we will iterate through. We can see this by running Debug on the pipeline and then viewing the output of the Metadata activity.
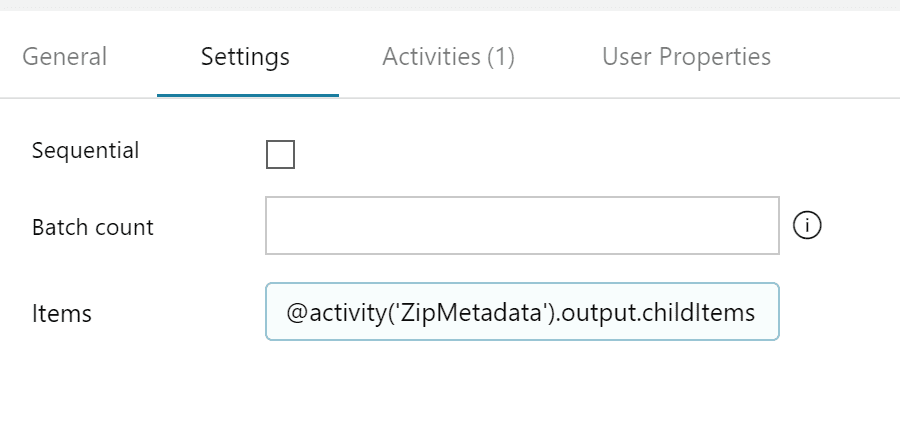
Next, we add the “ForEach” activity to the pipeline. We name our activity and connect the Get Metadata activity to the ForEach activity. Once named and connected, we access the Settings tab of the ForEach activity and then reference the Get Metadata activity child items in the “Items” section by entering “@activity(‘ZipMetadata’).output.childItems”. Now the ForEach activity is setup to iterate through the files contained within the zip file (the same items we saw as output from the Get Metadata activity).
After we update the settings, access the Activities menu inside the ForEach activity and drag in the Copy activity.
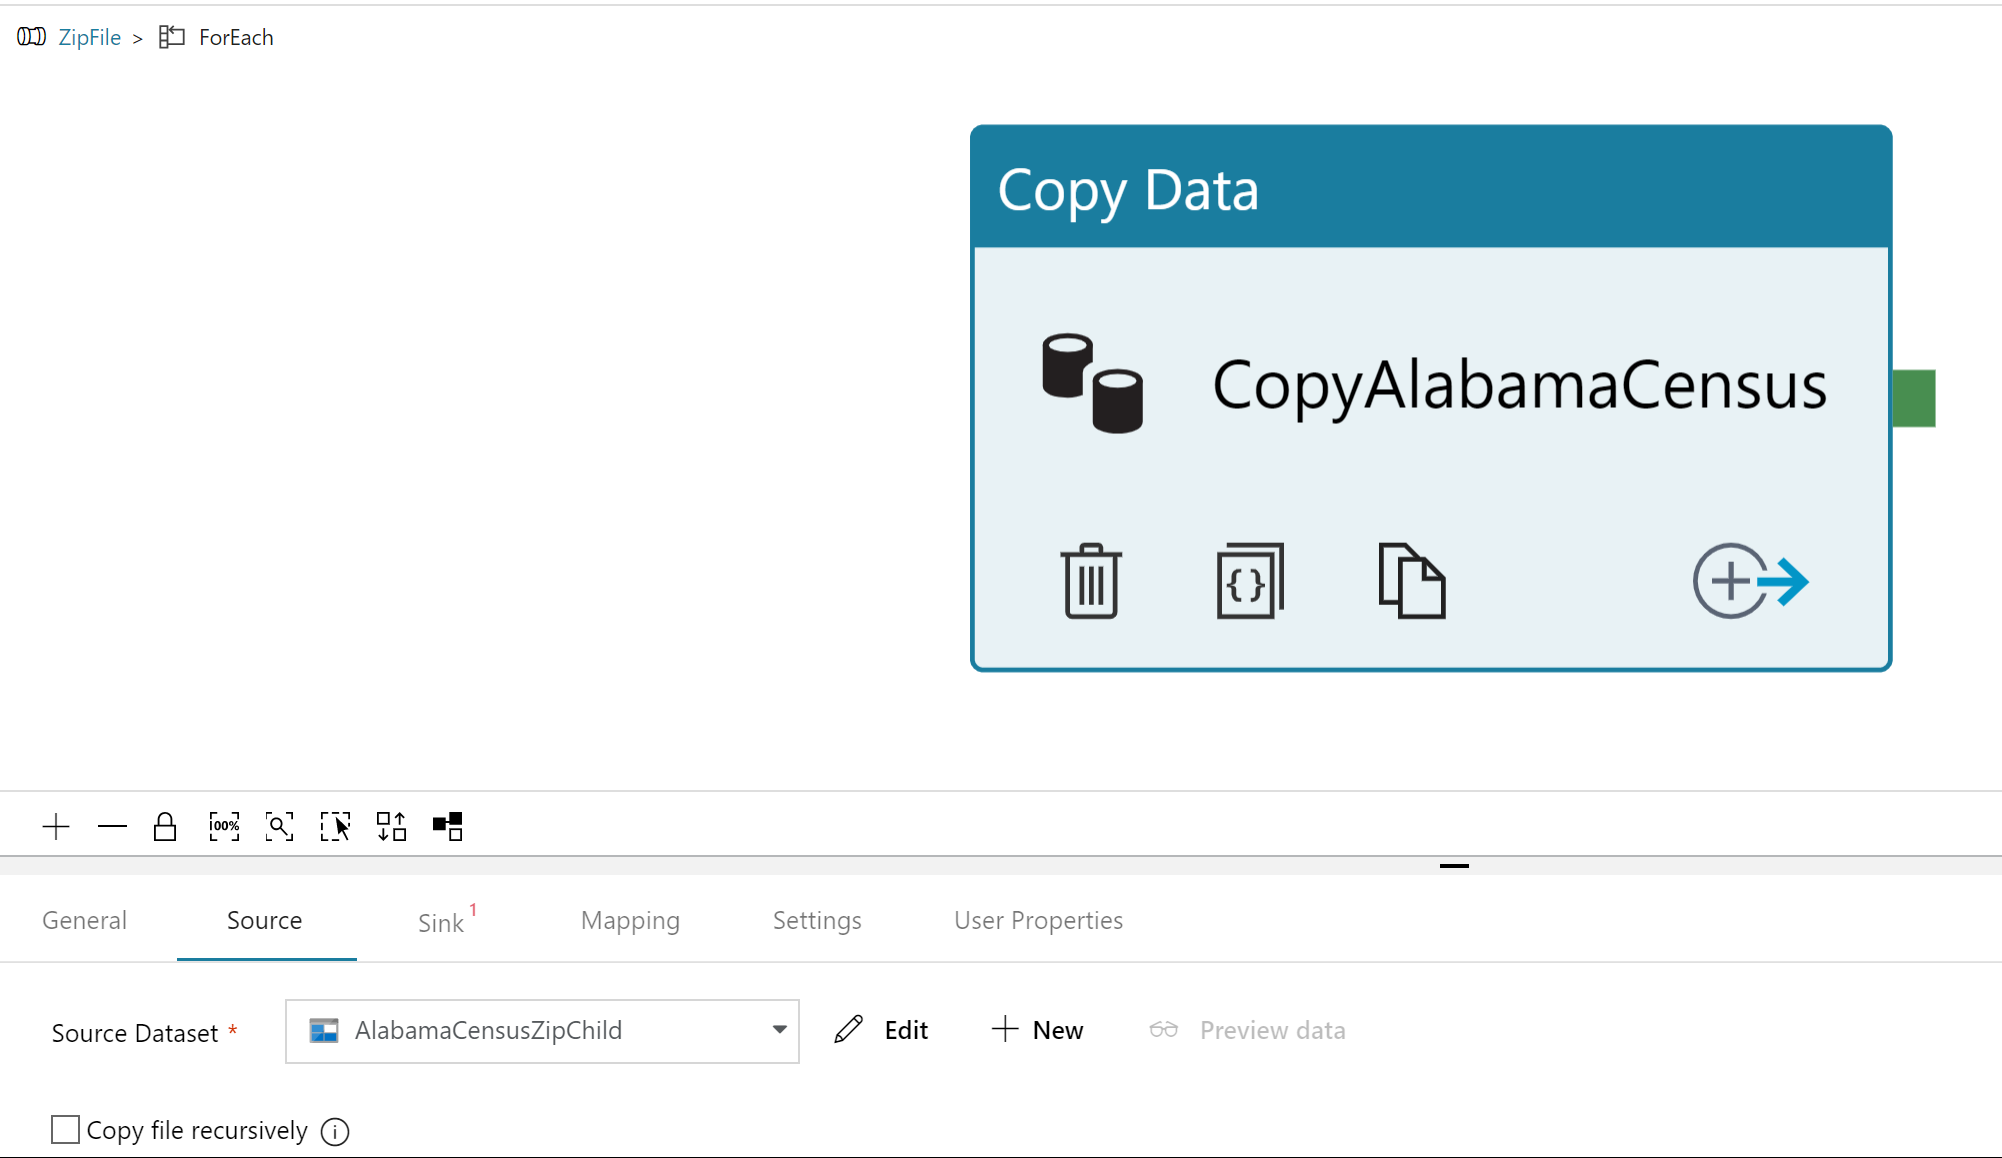
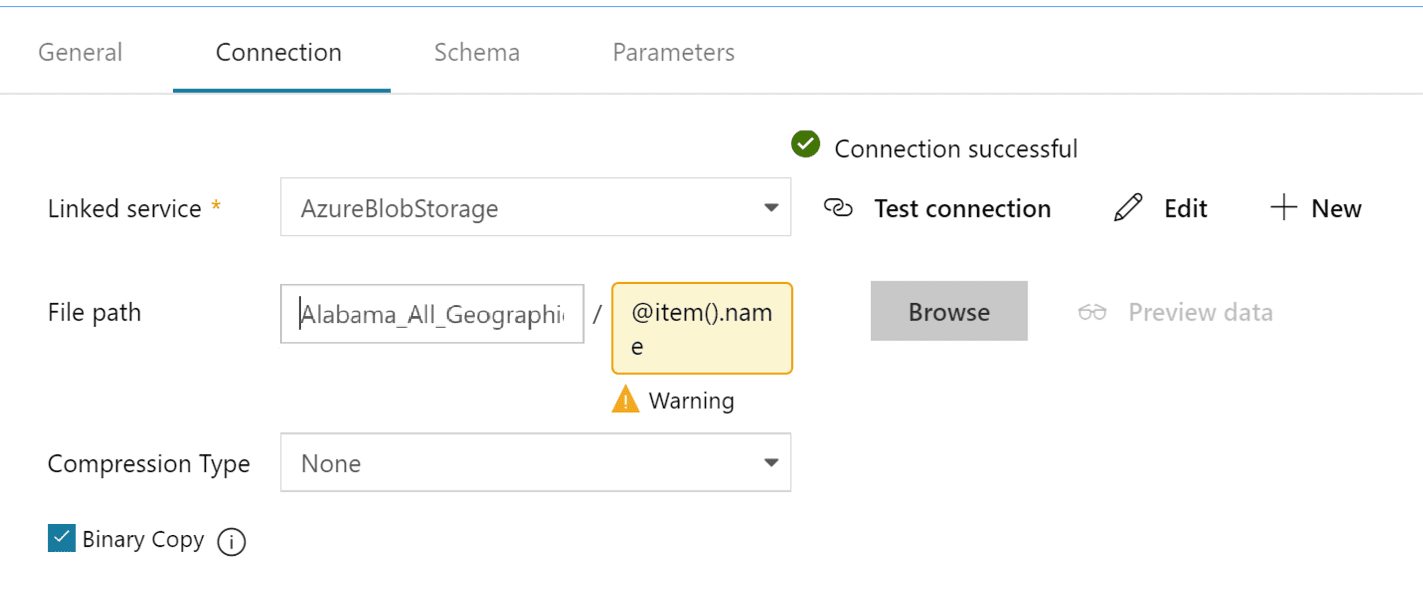
In the Copy activity, create a new Source that points at the zip file location in our blob store, then we use the “@item().name” value being generated by the ForEach activity to create the reference to the individual files within the zip.
Our next task is determining where our files will go by using Dynamic Content. Looking back at our requirements, we need to split the individual files out by multiple criteria. Estimate files and margin files each need to be grouped together and segmented by sequence, plus some files need to be handled based upon their file extension. Let’s return to our Copy activity; we select Sink and add in a new location. Then select the Connection tab and place your cursor in the Directory box. You should see “Add dynamic content” appear below.
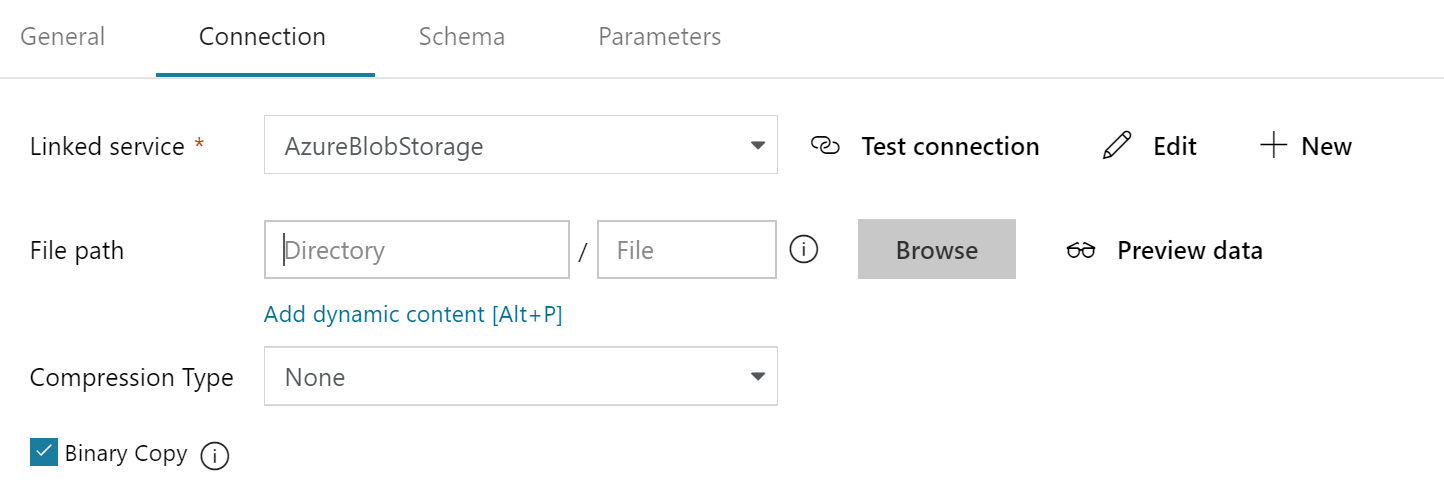
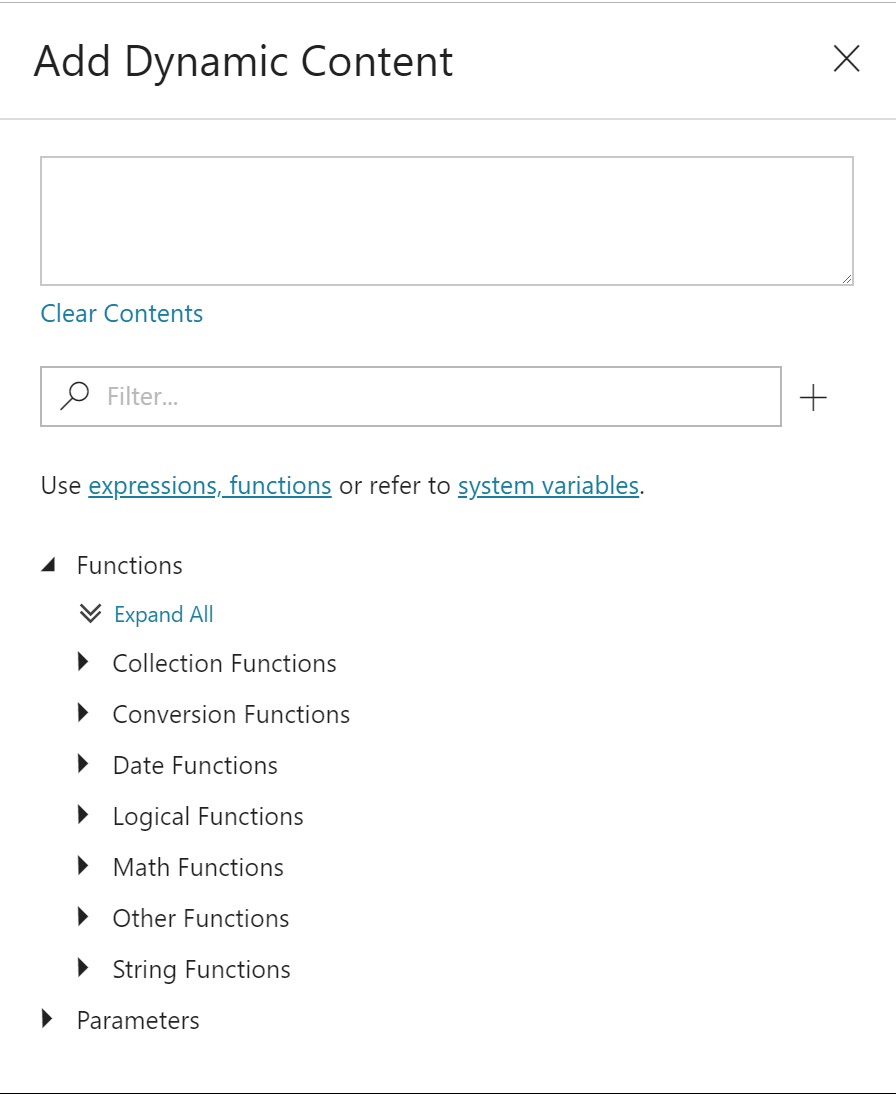
Click the Add dynamic content link to bring up the editor.
Now we get to translate our requirements into code using the Dynamic Content expressions provided by ADF V2. If we look back to our requirements, we see the following:
- If file starts with ‘e’ for estimate, place in a folder like ‘seq//e/’.
- If file starts with ‘m’ for margin of error, place in a folder like ‘seq//m/’.
- If file starts with ‘g’ for geo, place in a folder like ‘geo/csv’ or ‘geo/txt’ based upon the file extension.
Given those requirements, we first identify the starting value of the file names. In the Dynamic Content editor, we can see there are several function categories, including logical functions and string functions. To reference the names of the files within our zip, recall we are operating inside of the ForEach activity and the files can be referenced with item().. For the purposes of this example, we will use item().name. Let’s combine the IF function with STARTSWITH, CONCAT, SUBSTRING, and item().name to tackle the first piece of our scenario, what to do when the file starts with ‘e’.
@{IF(STARTSWITH(item().name,'e'),CONCAT('seq/',SUBSTRING(item().name,9,3),'/e/'),'false')}
As you can see, Dynamic Content in ADF V2 looks like what we see in the Excel formula bar or SQL editor. This should be comforting for new users. However, there are a few things new users should be made aware. With Dynamic Content, we wrap our entire expression within braces {} and place @ at the beginning. Also, SUBSTRING starting position is 0.
After validating the pipeline and then selecting Debug, we let the pipeline run and check how our Dynamic Content expression handled our files.
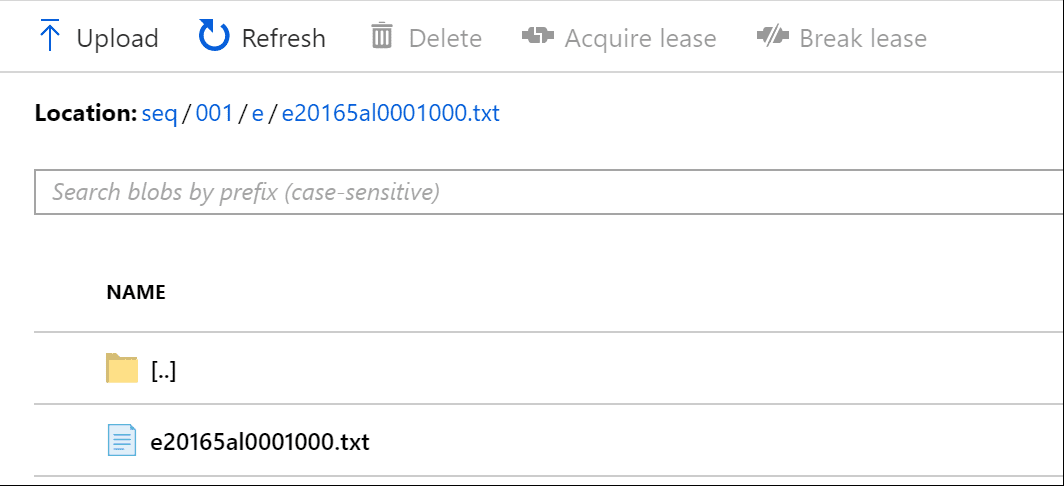
It worked! From here, we can continue to expand our Dynamic Content expression to handle the remaining items from our use case.
@{IF(STARTSWITH(item().name,'e'),CONCAT('seq/',SUBSTRING(item().name,9,3),'/e/'), IF(STARTSWITH(item().name,’m’),CONCAT(‘seq/’,SUBSTRING(item().name,9,3),’/m/’),
IF(AND(STARTSWITH(item().name,’g’),ENDSWITH(item().name,’txt’)),’geo/txt/’,
IF(AND(STARTSWITH(item().name,’g’),ENDSWITH(item().name,’csv’)),’geo/csv/’,’fail’)
)
)
)
}
Our use case is complete. The 200+ files contained in the Alabama census zip file will now automatically move to the proper location. Because our solution isn’t hard-coded, we can use the same code to ingest additional states from the Census website. Dynamic Content can even be used to create dynamic SQL queries! When Azure Data Factory V2 Dynamic Content and Activities are combined, even complicated data movement can be easily tackled.