Welcome to the first installment of an in-depth look at Knowledge Mining – the ability to use Microsoft Azure’s advanced AI Search capabilities to comb through all of your data (PDFs, emails, scanned documents, images, etc.) to glean insight. In this series, I’m going to take you through Microsoft’s Azure Cognitive Search (Azure Search with human-like reasoning capabilities) and show you the ins and outs of effectively using this awesome tool to uncover insight from enterprise data, whether structured or raw.
Let’s begin by digging in to Azure Search.

Azure Search
Managed by Microsoft, the intelligent Azure Search cloud solution-as-a-service has built-in cognitive abilities. Recognizing and extracting text and identity from images; highlighting key talking points from text; and the power to recognize and classify people, places, and things from text and images, are among its innovative capabilities.
This expansive offering can help dig deep into your organization’s data, often uncovering rich insight. 3Cloud is currently working on one such project for a private global energy exploration and engineering company. Leaders here needed a way look back at decades of data, recorded in paper files, without a team of archivists. We’re working with the worldwide energy giant, using cloud-scale technology, to digitize, store, and offer deep search capabilities on more than six million documents. By combining Azure Search with Knowledge Mining, we will ultimately provide nearly instantaneous access to information that once would have taken a team of people potentially months (if ever) to uncover.
So, what is Knowledge Mining?
Knowledge Mining
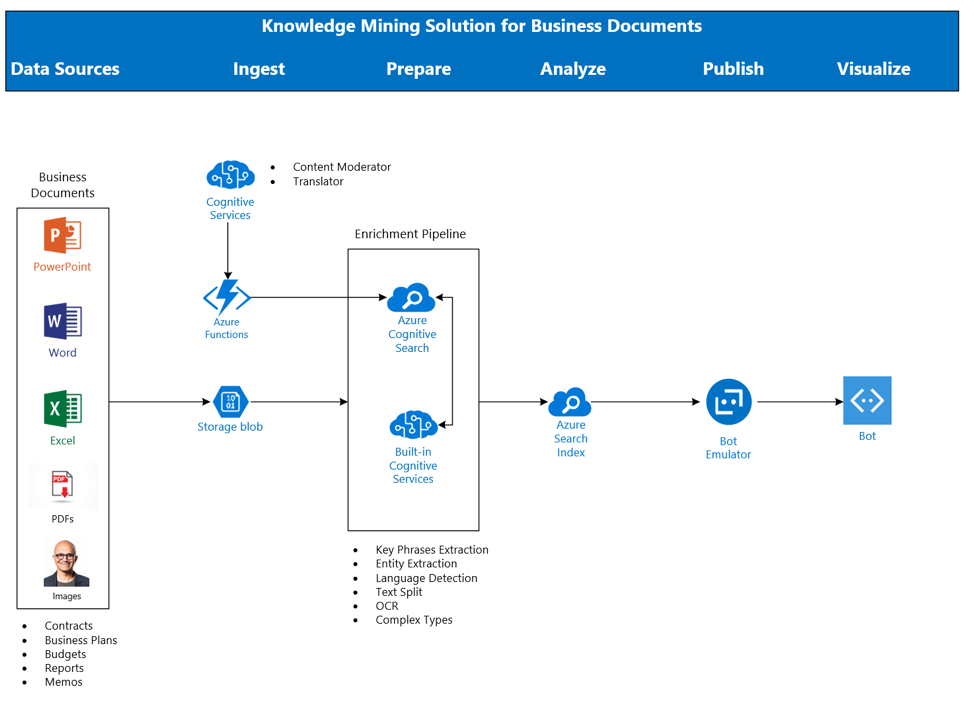
Knowledge Mining is a cognitive search-based technique of extracting facts from unstructured data. It’s like having a crew of experts comb through your most important documents to discover and leverage data to drive your enterprise. This content comprehension capability can be used to create in-depth search resources that inform an organization’s employees and enrich its clients and customers.
In today’s tutorial, I’ll offer step-by-step instructions on creating a search service and an index.
Creating an Azure Search Service and Index
The first step in creating an effective search is providing the data that we are going to search. Azure Search can be used against several data sources, both structured (Azure SQL Database and Cosmos DB) and unstructured, in the form of Azure Blob Storage. Blob indexers can extract text from major file formats such as Microsoft Office, PDF, and HTML documents.
In this how-to series on Knowledge Mining, we’ll be focusing on unstructured data, so let’s create some blob storage.
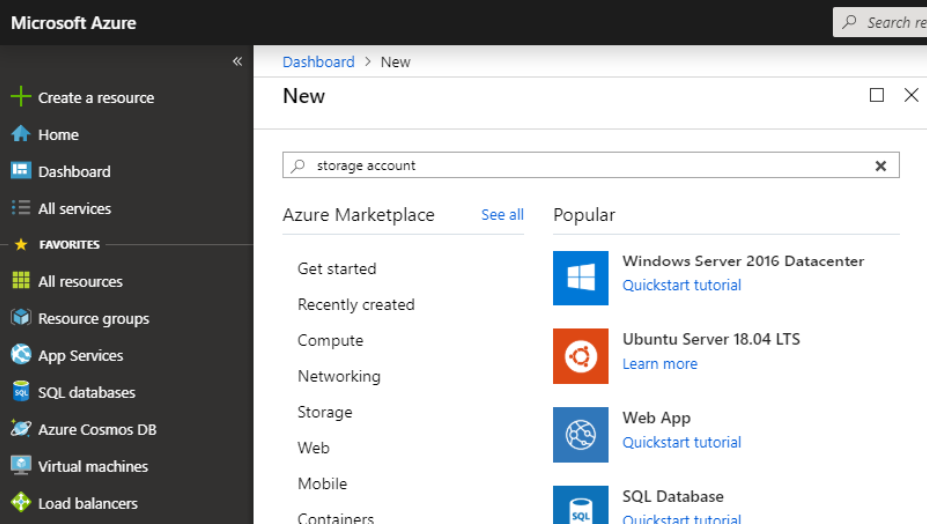
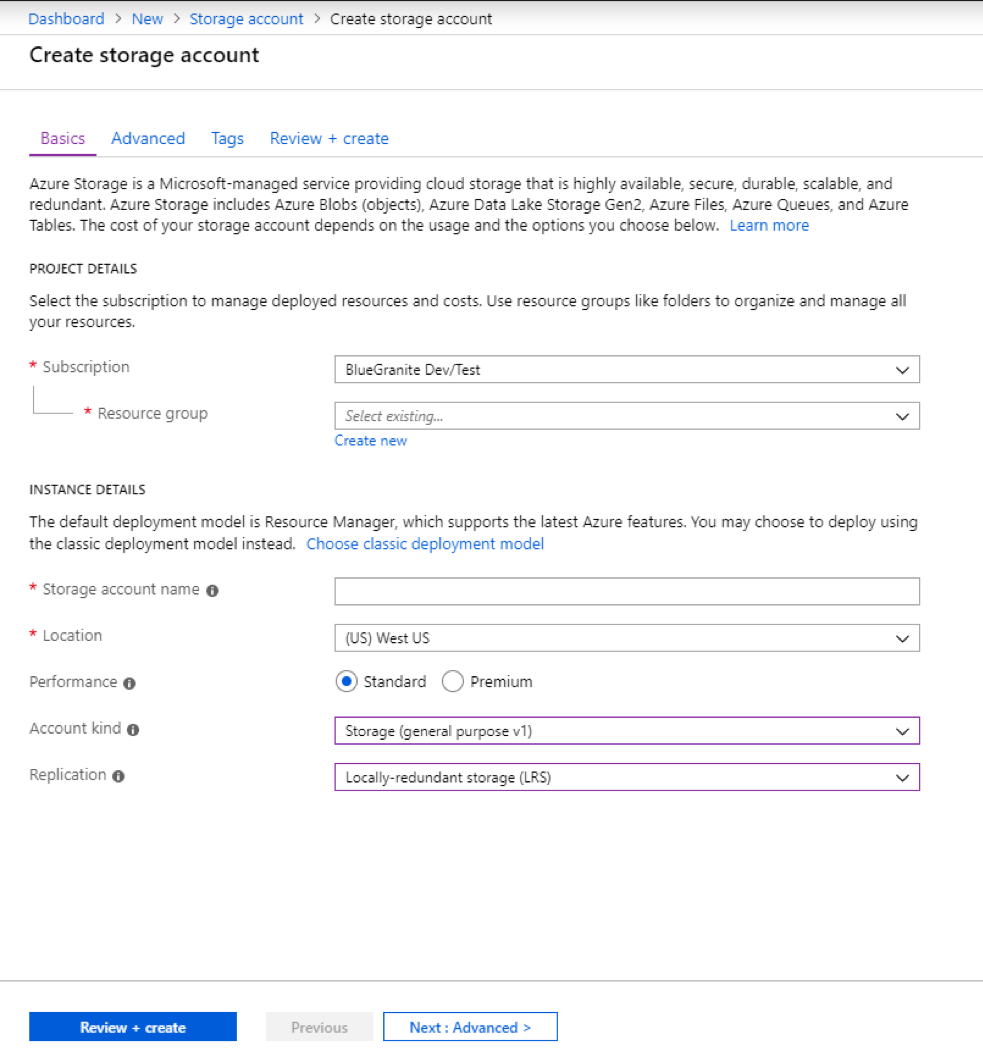
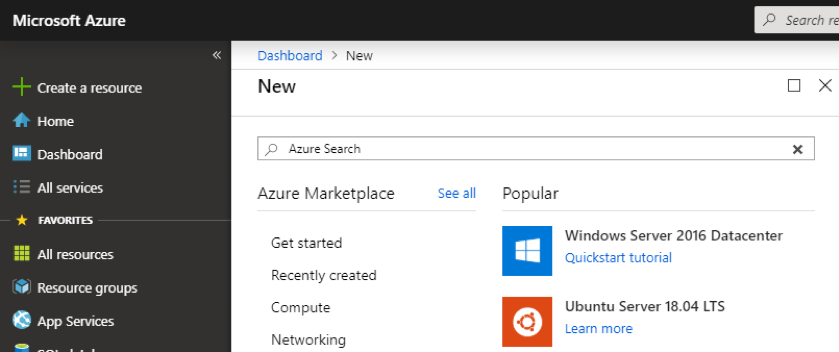
First, we need to create a storage account to hold our blobs. From the Azure Portal, select the Create a resource option and then type storage account into the search box. Select Storage account from the drop-down under the search box.
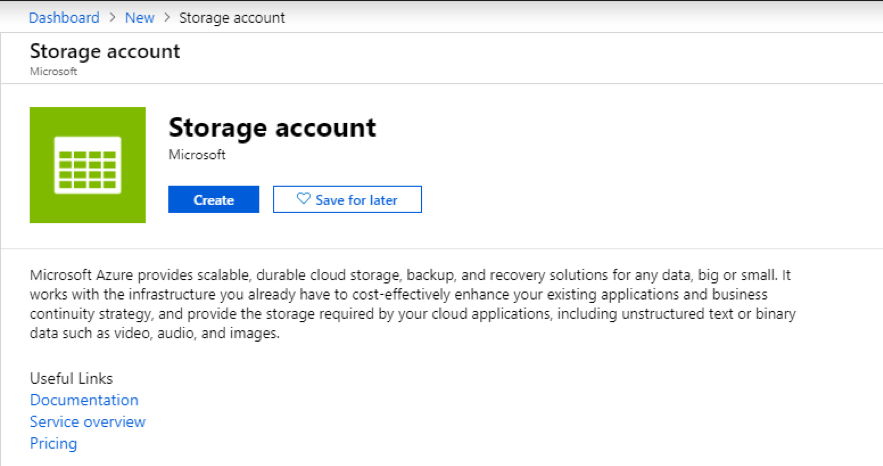
Click on the Create button.
And now add the details:
- Select your Subscription and Resource group that you are using for your search.
- Enter a Storage account name. Note that this name must be unique across all storage account names.
- Select a Location that you will use for creating all of your resources throughout this exercise.
- Make the following selections:
- Performance: Standard
- Account kind: Storage (general purpose v1)
- Replication: Locally-redundant storage (LRS)
- Click on the Next: Advanced> button.
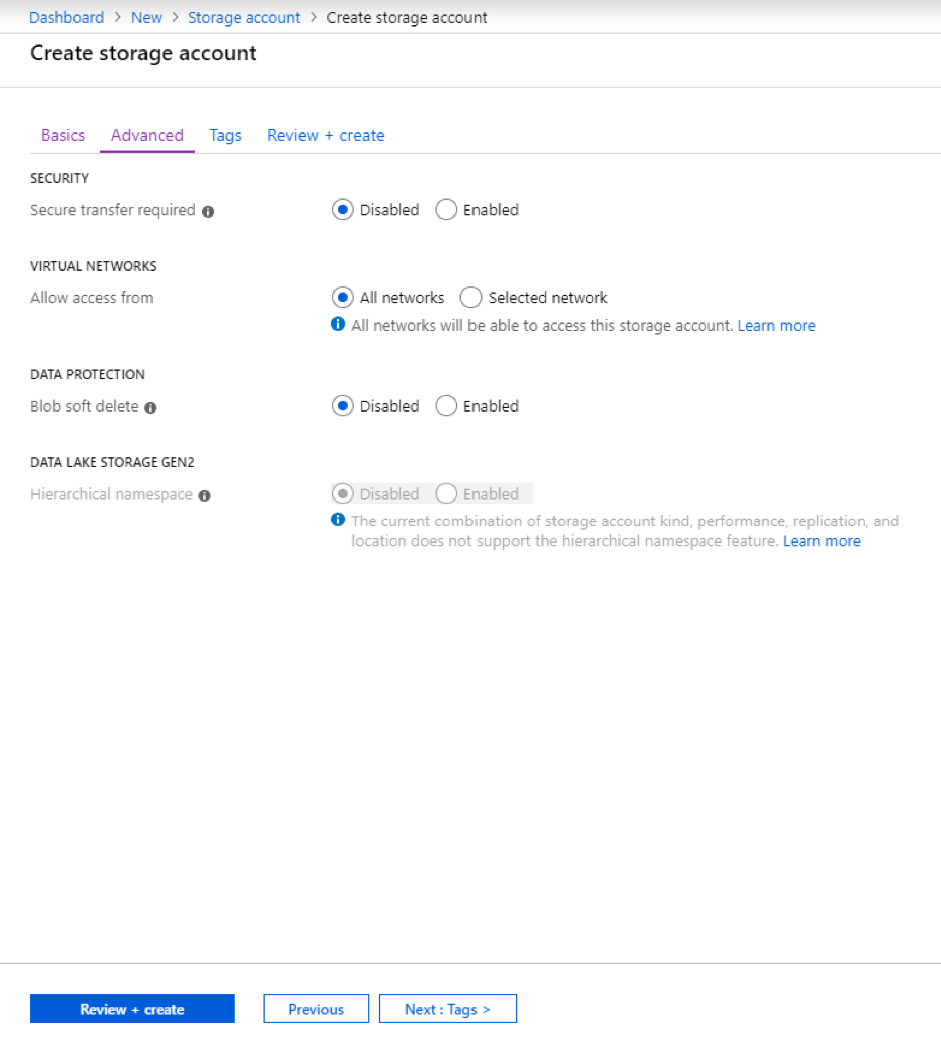
On the next page, make the selections shown below and then click on the Review + create button.
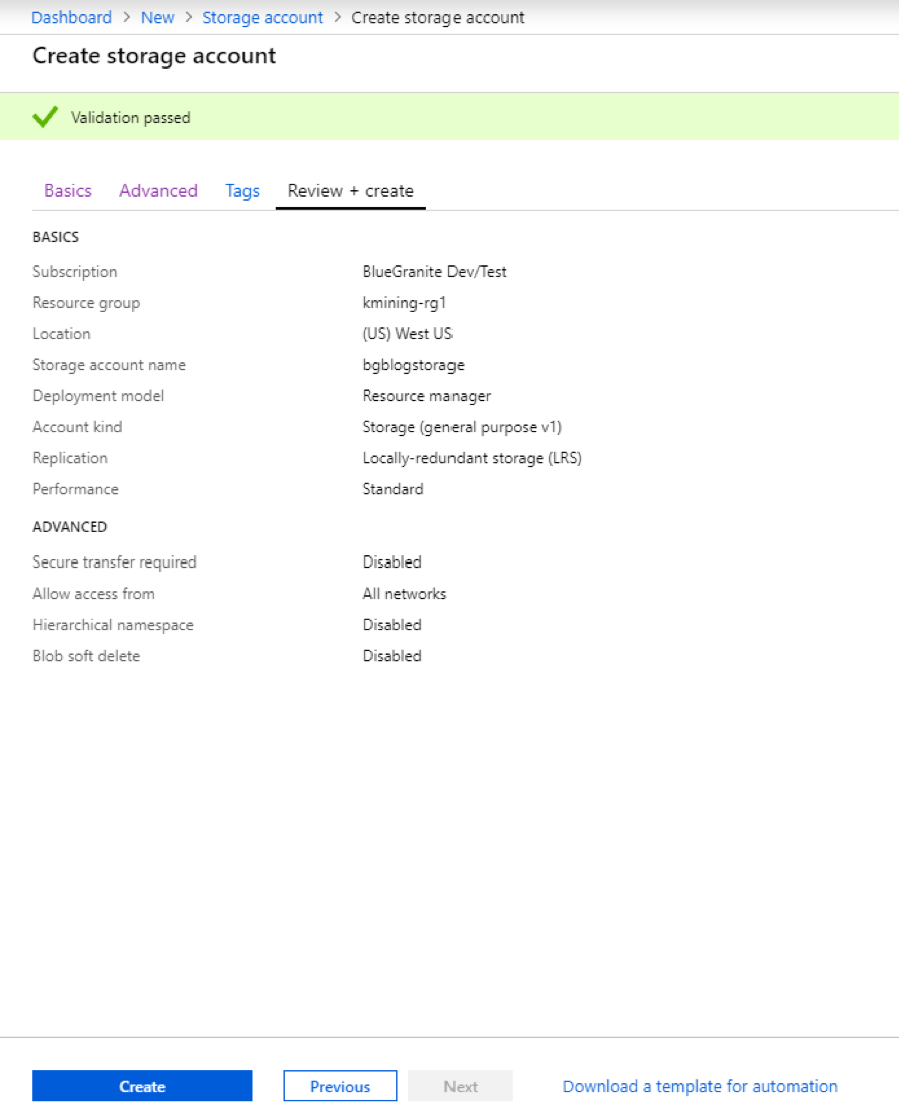
Now press the Create button and wait for the deployment of your new storage account to complete.
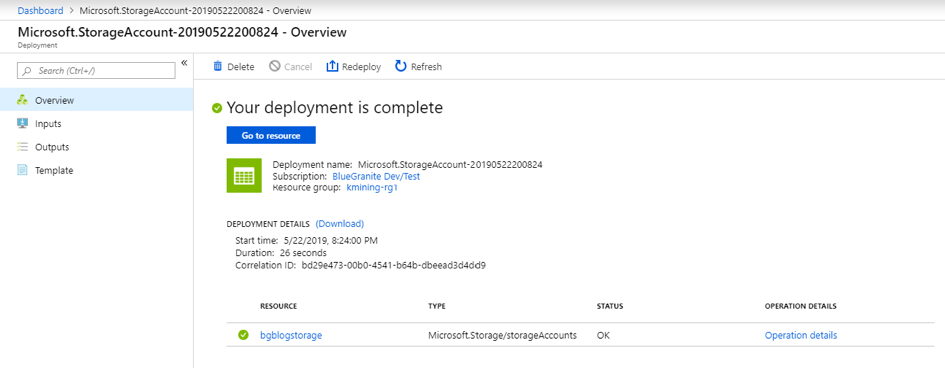
When your deployment is complete, you will see a link to your new storage account at the bottom of the page. Click on it to move to the next step.
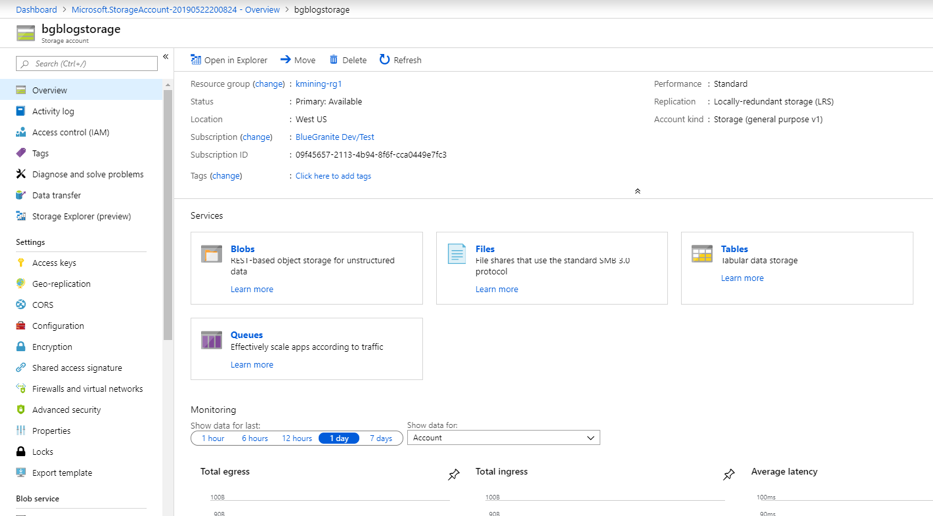
You’ll now see the Storage Account Overview page. We will create our searchable blob storage in this storage account by clicking on the Blobs link in the middle of the page.
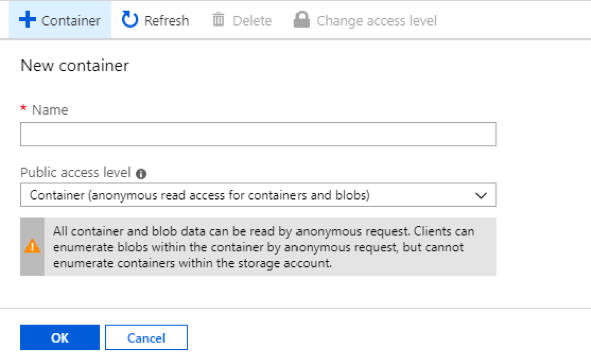
Click on the big plus sign + Container in the upper left of your screen and enter a name for your container. Think of a container as a folder that will hold all of our documents.
Select Container (anonymous read access for containers and blobs) for your Public access level and click on the OK button.
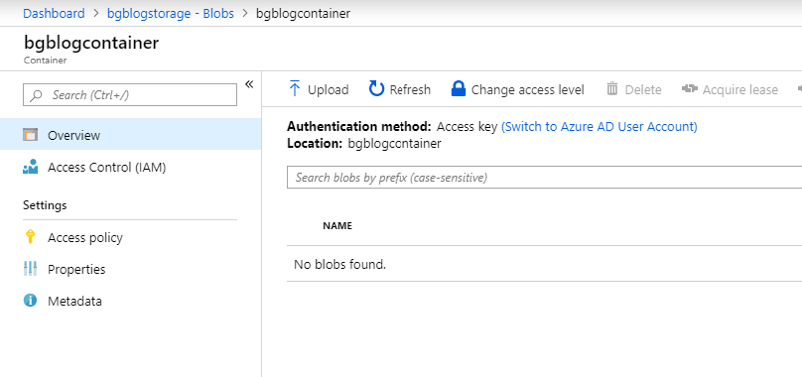
Click on the name of your new container.

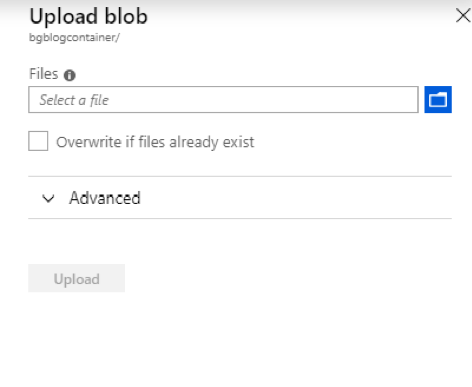
You should now see the Overview of your blob container. Now we need to add the files that we are going to be searching. We do this by clicking on the Upload option in the upper left of the screen.
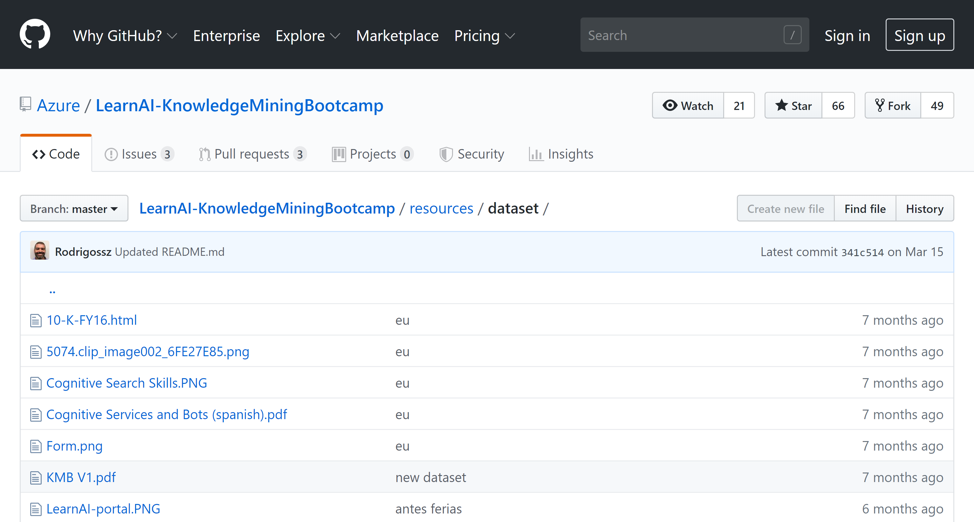
You’ll see this on the right side of your screen. For this series, we’ll be working with a common data set used in Microsoft’s Knowledge Mining Bootcamp, which is an excellent introduction to Azure Search as well. You can go to the Bootcamp. To get the dataset, go to the GitHub repository at https://github.com/Azure/LearnAI-KnowledgeMiningBootcamp.git and clone the repository. You’ll find the sample data in the resources/dataset/ folder.
From the Azure Portal, click on the selection button and select all of the files in the dataset folder.
Now we are ready to create a search service and index all of the documents we just uploaded.
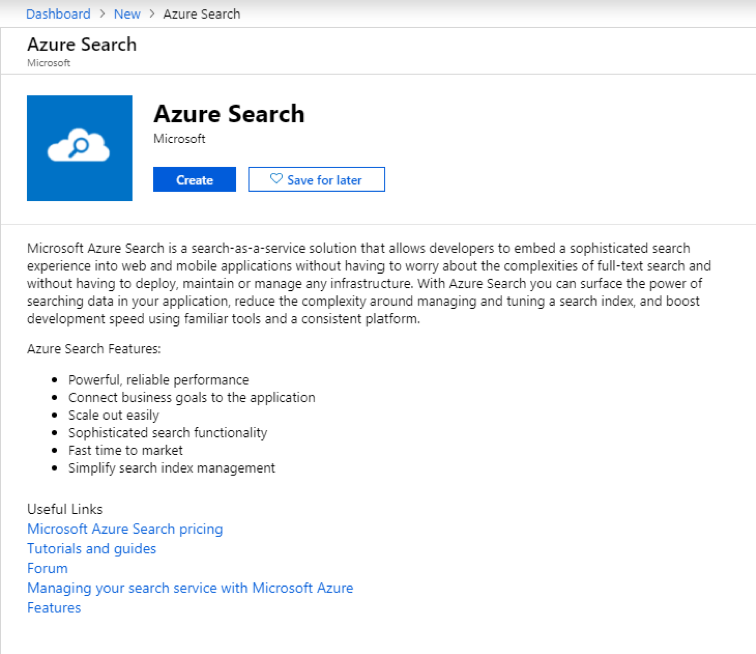
Create a new Azure Search Service by clicking on the Create a resource menu item in Azure Portal and then type Azure Search into the search box. Select Azure Search from the drop-down under the search box.
Click on the Create button.
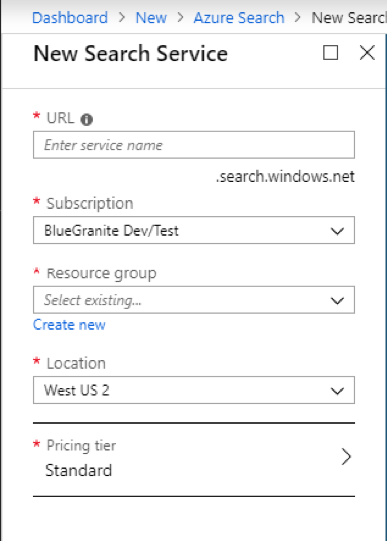
Enter a name for your search service, the subscription and resource group you want your searching to be done in, and the location. You will want these to all match the setting on the storage account that you created earlier. You can use the Free pricing tier for these exercises but understand that it is very limited and should only be used for dev/test.
Click the Create button and wait for your new Search Service to be created.
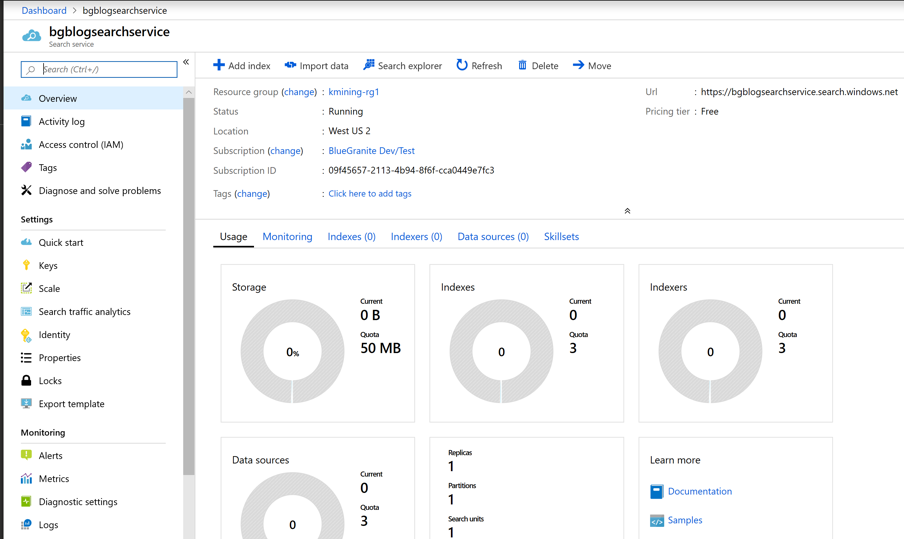
Now that the search service is created, you should see something similar to this:
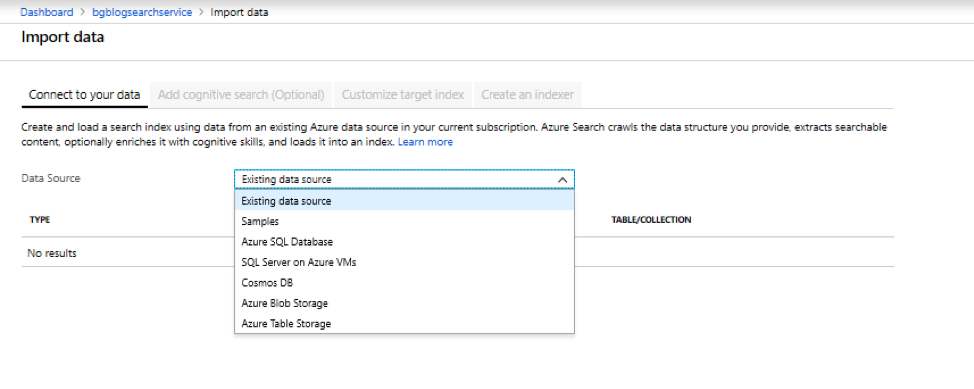
Next, we’ll create the index that will hold all of the information for our search. Click on the Import data link on the top of the page. On the next screen, select Azure Blob Storage from the Data Source drop-down list.
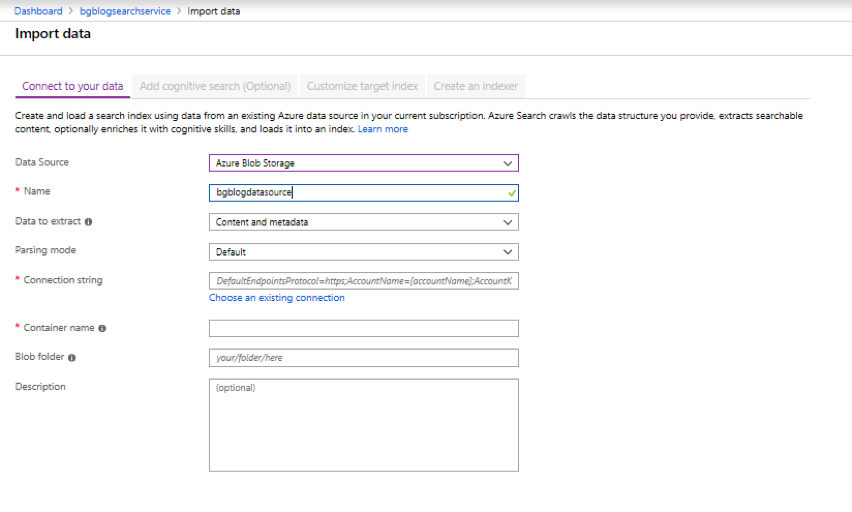
Name your data source and then click on Choose an existing connection and select the storage account that you created earlier. You will then select the container that you created and press the Select button. Leave all other fields at their default values and press the Next: Add cognitive search (Optional) button on the bottom of the screen. Azure Search will try to infer index fields from the files in your storage account. Since we are working with unstructured data, it will only come back with standard search fields.
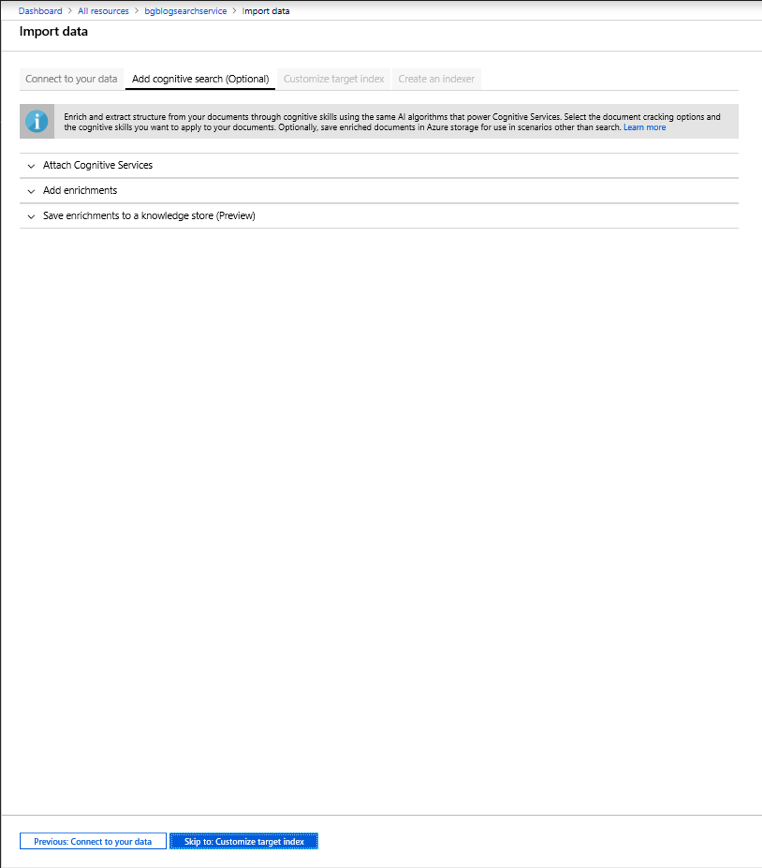
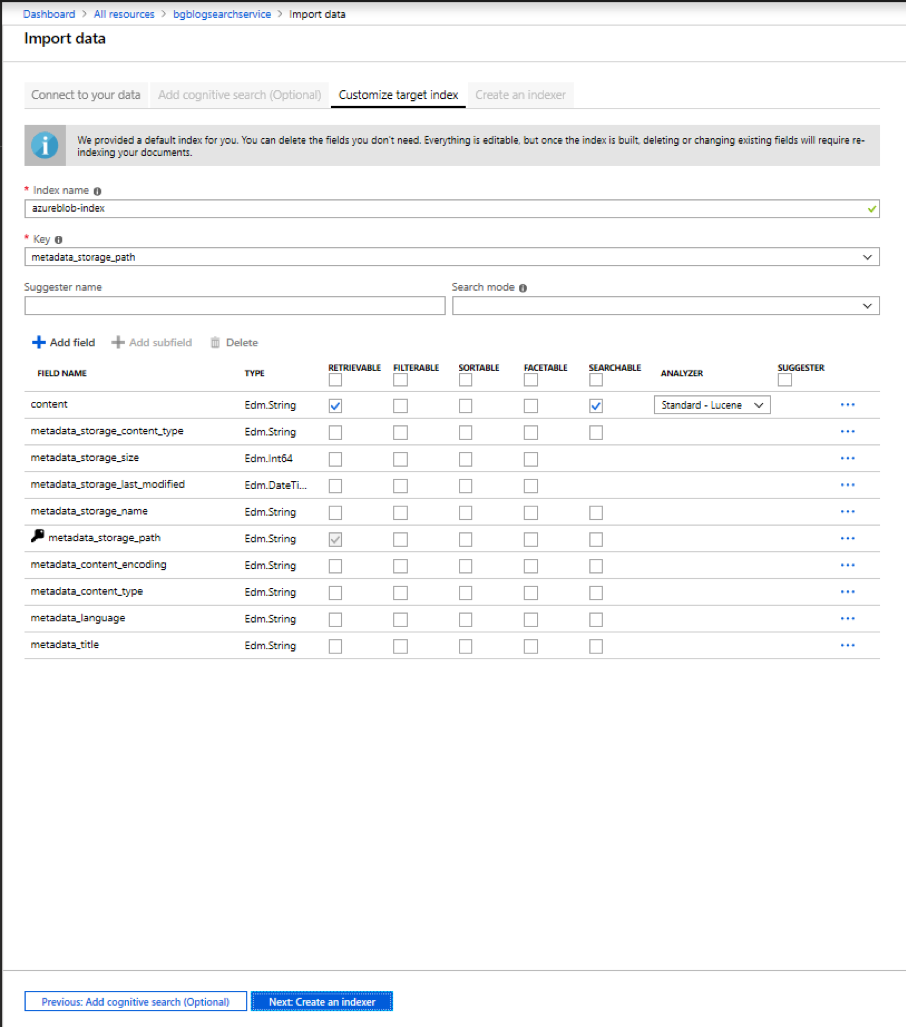
We’re going to skip the cognitive search settings for now (much more on this in future posts). Press the Skip to: Customize target index button.
We’ll leave all of the settings at their default value for now. Press on the Next: Create an indexer button.
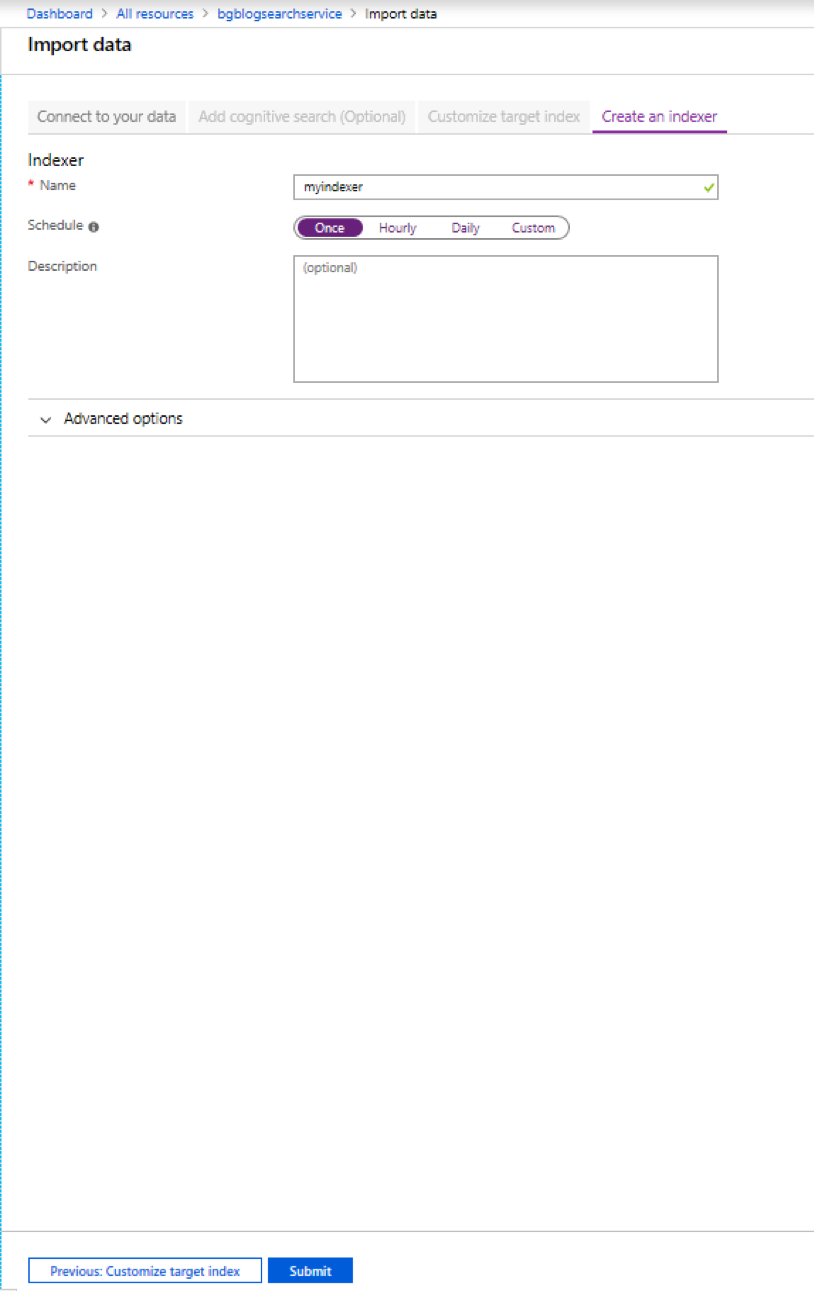
Change the Schedule value to Once. You can leave all of the other fields at their default value and press on the Submit button at the bottom of the screen.
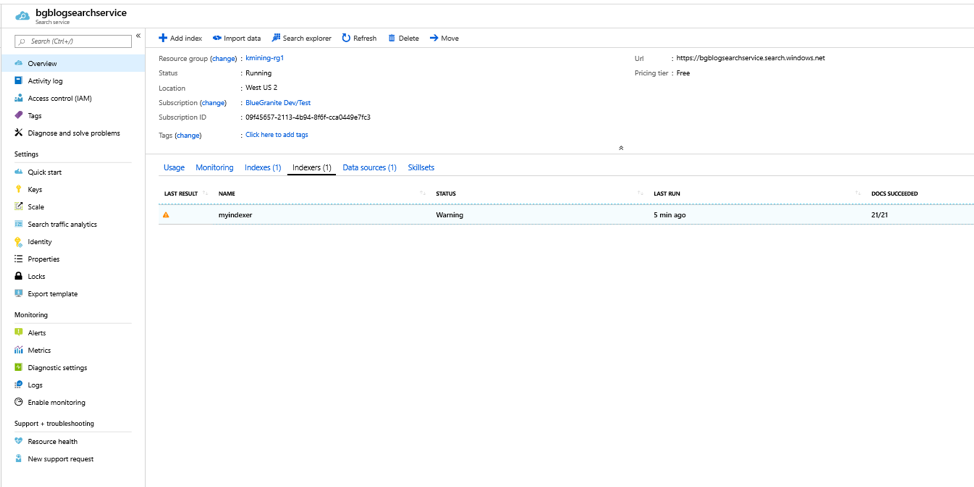
When the index creation is complete, it will take you back to the Search Service Overview page. Notice that the Index, Indexers, and Data sources menu items in the middle of the page all have a (1) next to them showing the number of elements in each area.
Congratulations! You’ve just built your first searchable index.
Click on the Indexers(1) link in the middle of the page. You’ll see that the status is set to Warning. Let’s look into that by clicking on the line for your indexer.
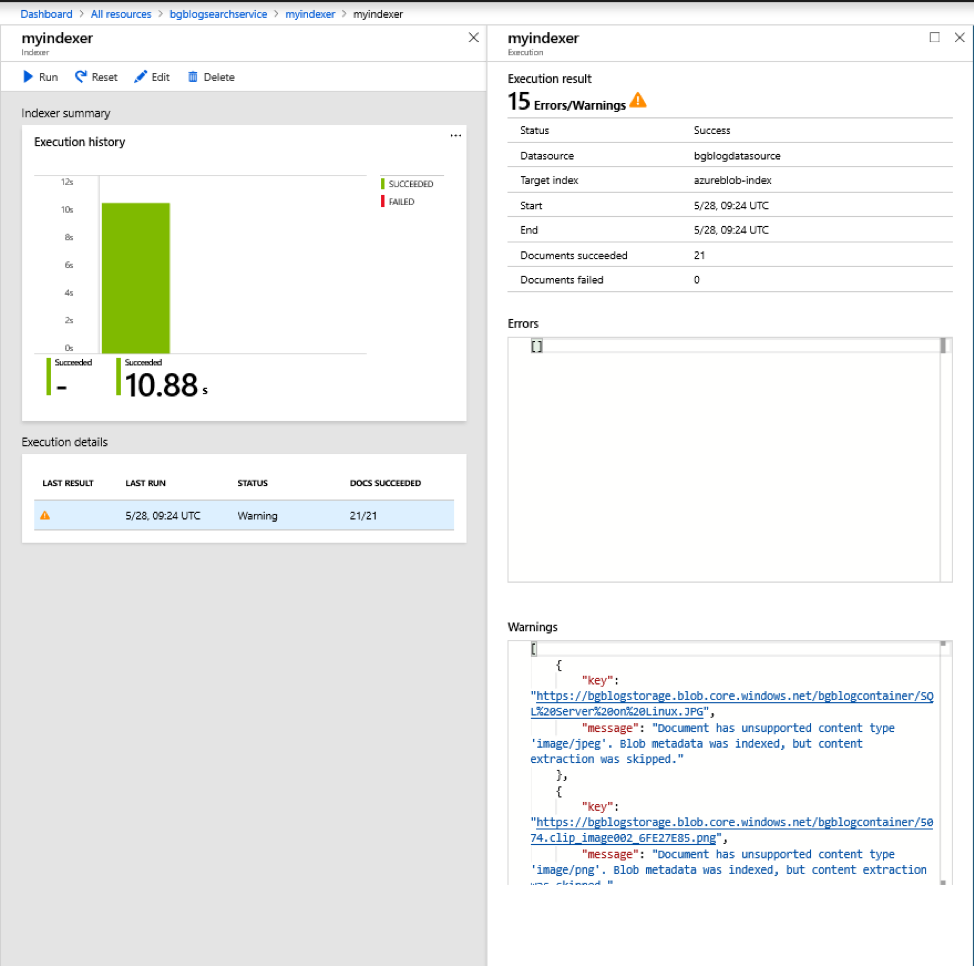
Click on the line in the Execution details section for the indexer we just ran. In the new blade, you’ll see several entries in the Warnings section. There are two kinds of warnings: 1) Document has unsupported content type, and 2) Truncated extracted text to 32768 characters. The first warning is because several of our files contain images. The standard Indexer does index images. We have to add a cognitive service for image cracking. We’ll do this in our next session. The second warning is because we selected the Free pricing tier when we created our search service. The Free pricing tier only allows a maximum of 32,768 characters to be extracted out of a document.
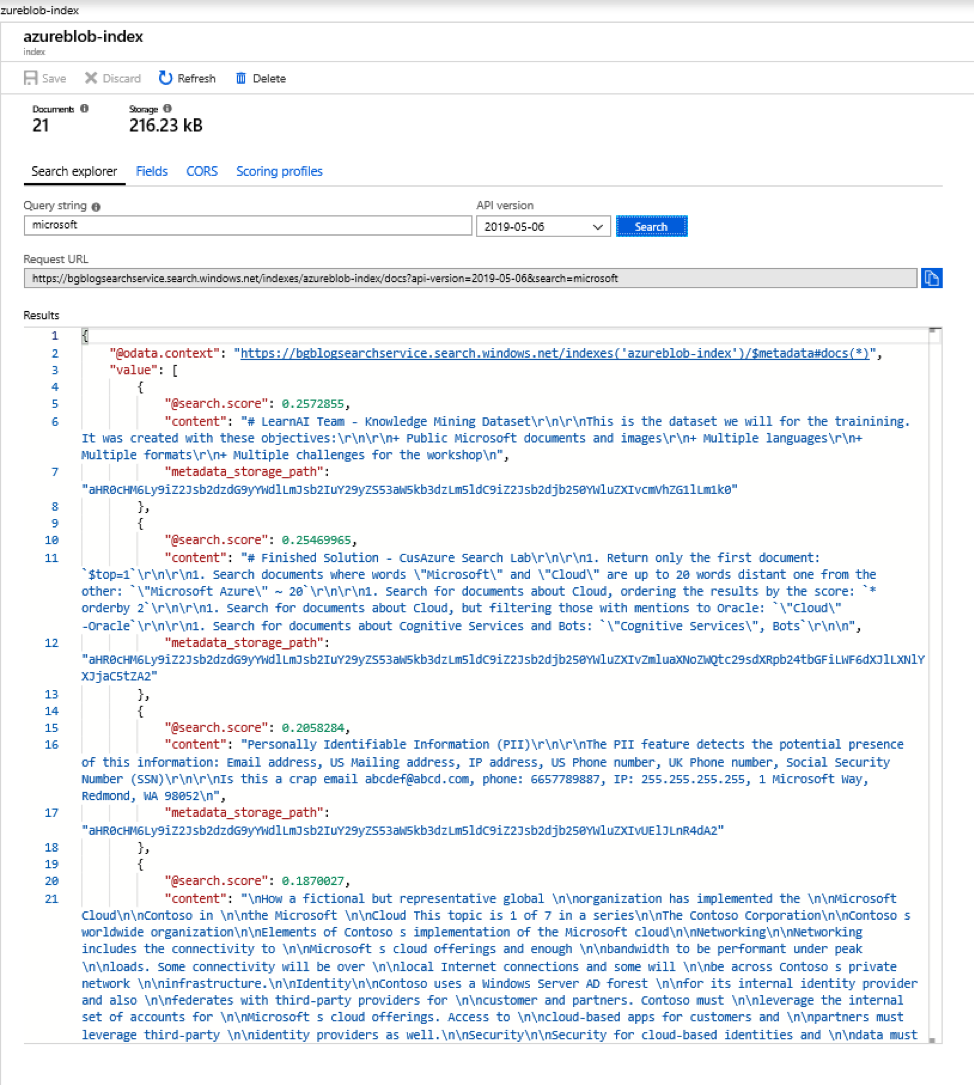
Go back to the Search Service Overview page and click on the Indexes(1) link and then again on the line with the index that you just created. From the Index Screen we can query a selected index and test it out. Try it out. Type “Microsoft” in the Query String field and click Search. You’ll see the results returned in JSON. Using the dataset from the Knowledge Mining Bootcamp, you’ll see 10 documents returned.
More to Come
In the coming weeks I’ll be exploring the many ways to use Azure Cognitive Search to more easily unearth knowledge from once-difficult-to-mine data sources. Be sure to subscribe to our blog so that you don’t miss a tutorial, or contact us today to discover the many ways 3Cloud can make the most of your data!
Editor’s note: This post was edited 10/2020 to reflect system updates.